Microblading has become increasingly popular in recent years as a way to achieve perfect, natural-looking eyebrows. This semi-permanent makeup technique involves using a small handheld tool to create hair-like strokes on the brow area, resulting in fuller and more defined brows. However, before diving into the world of microblading, it is important to understand the basics of the procedure and what it entails. This article will provide a comprehensive guide to microblading, covering everything from preparation and tools to the actual procedure and aftercare.
Understanding the Basics of Microblading: What You Need to Know
Microblading is a form of cosmetic tattooing that involves manually depositing pigment into the upper layers of the skin using a small handheld tool with tiny needles. Unlike traditional eyebrow tattooing, which uses a machine, microblading creates more natural-looking results by mimicking the appearance of individual brow hairs. The strokes created during microblading are fine and crisp, resulting in a realistic and three-dimensional effect.
One of the key differences between microblading and other brow treatments, such as eyebrow pencils or powders, is its longevity. While traditional makeup products need to be applied daily and can smudge or fade throughout the day, microblading can last anywhere from one to three years, depending on various factors such as skin type and aftercare.
The benefits of microblading are numerous. For those with sparse or thinning eyebrows, microblading can help create the illusion of fuller brows by filling in gaps and adding definition. It can also save time in your daily beauty routine, as you no longer need to spend time filling in your brows with makeup. Additionally, microblading is a great option for those with allergies or sensitivities to traditional makeup products.
The Importance of Proper Preparation: Getting Your Brows Ready
Before undergoing microblading, it is important to properly prepare your brows to ensure the best possible results. This includes avoiding certain treatments and finding a qualified microblading artist.
To prepare your brows for microblading, it is recommended to let them grow out for at least two weeks prior to the procedure. This allows the microblading artist to see the natural shape and fullness of your brows, which will help guide the shaping process. It is also important to avoid any treatments that can thin or irritate the skin, such as waxing, threading, or chemical peels, for at least two weeks before microblading.
Finding a qualified microblading artist is crucial for achieving the best results. Look for someone who has received proper training and certification in microblading. Ask to see before and after photos of their previous clients to get an idea of their skill level and style. It is also important to have a consultation with the artist beforehand to discuss your desired brow shape and color.
Choosing the Right Microblading Tools: A Guide to Equipment
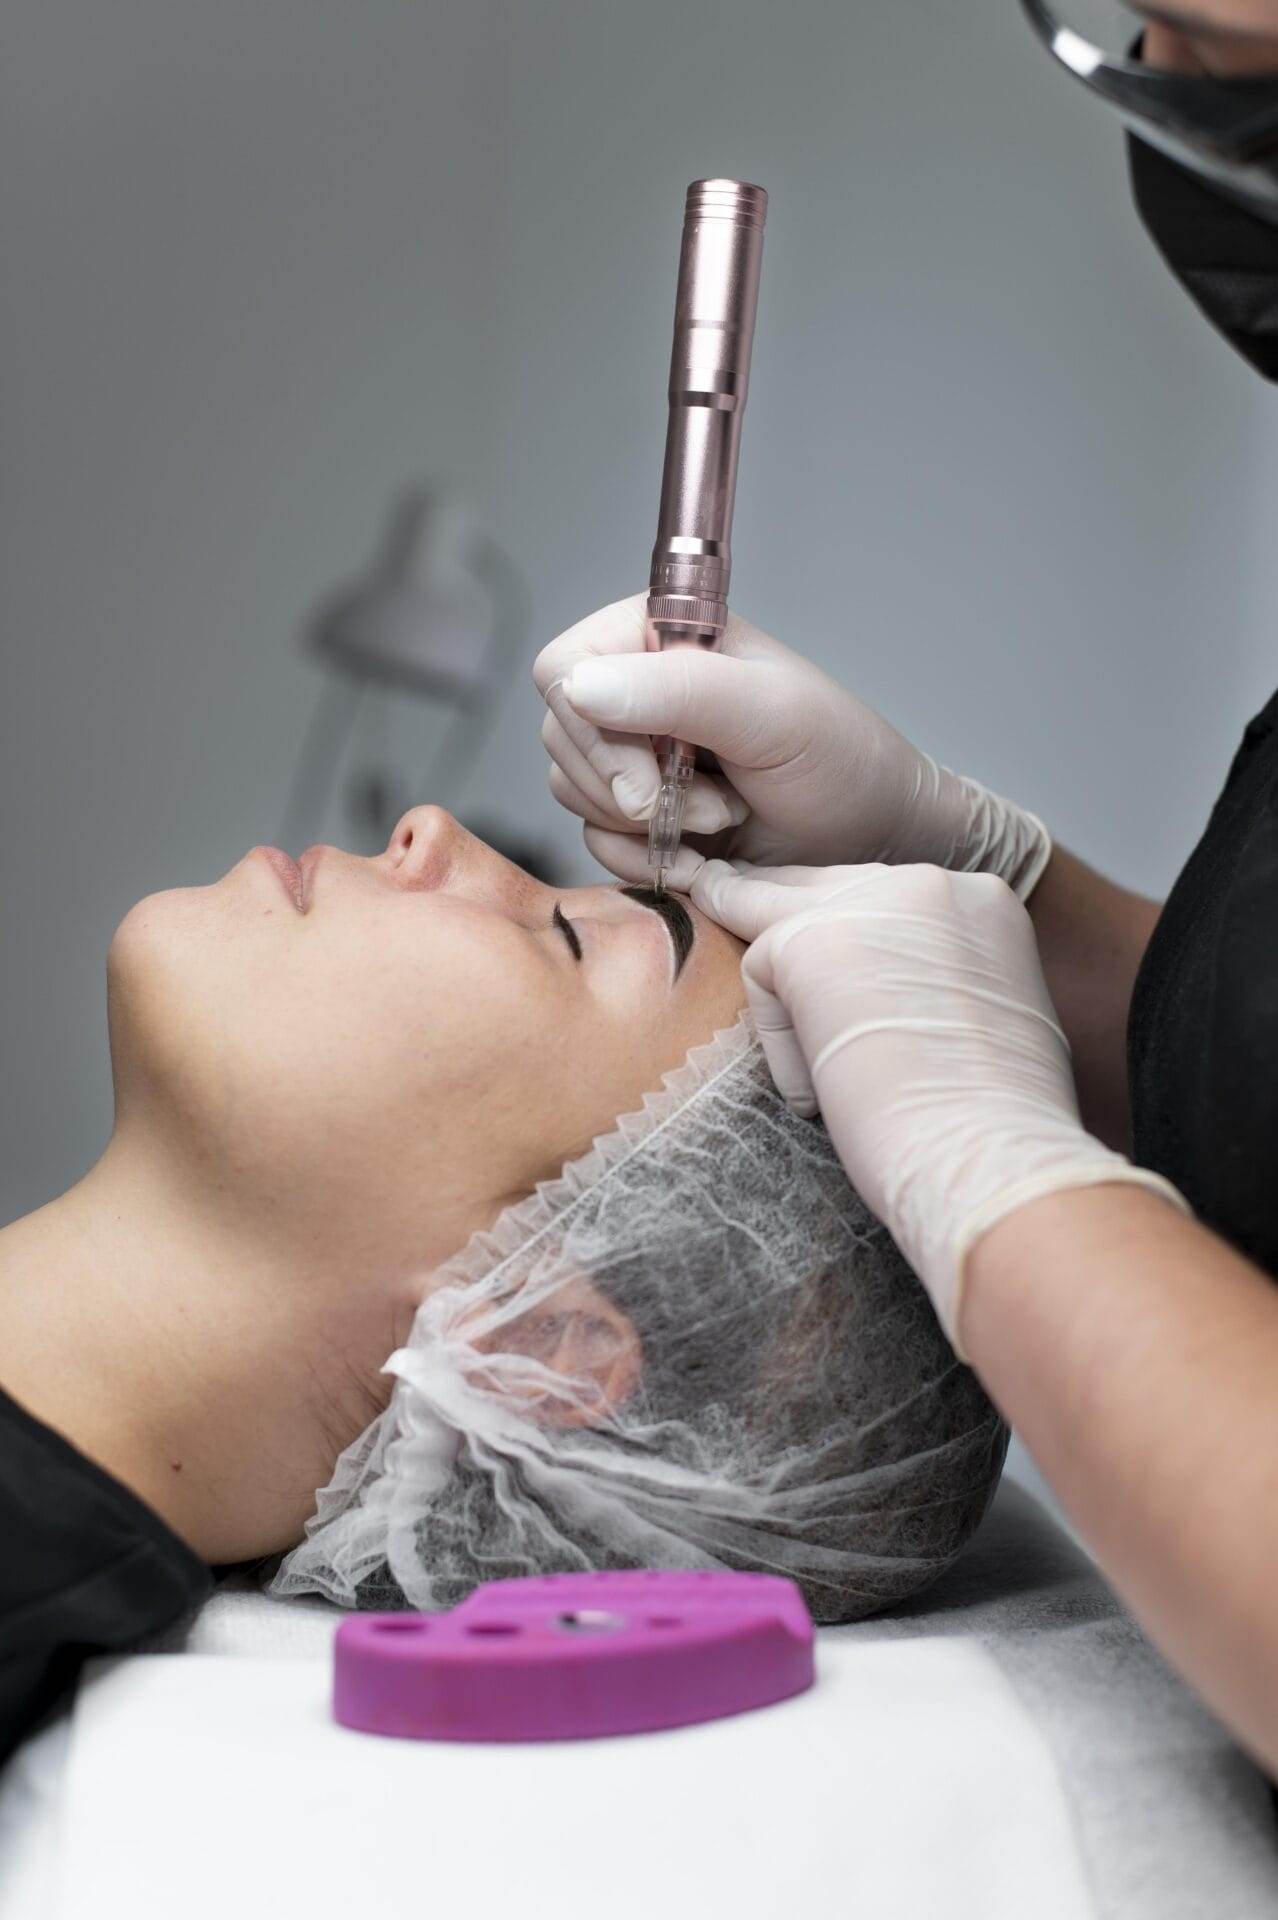
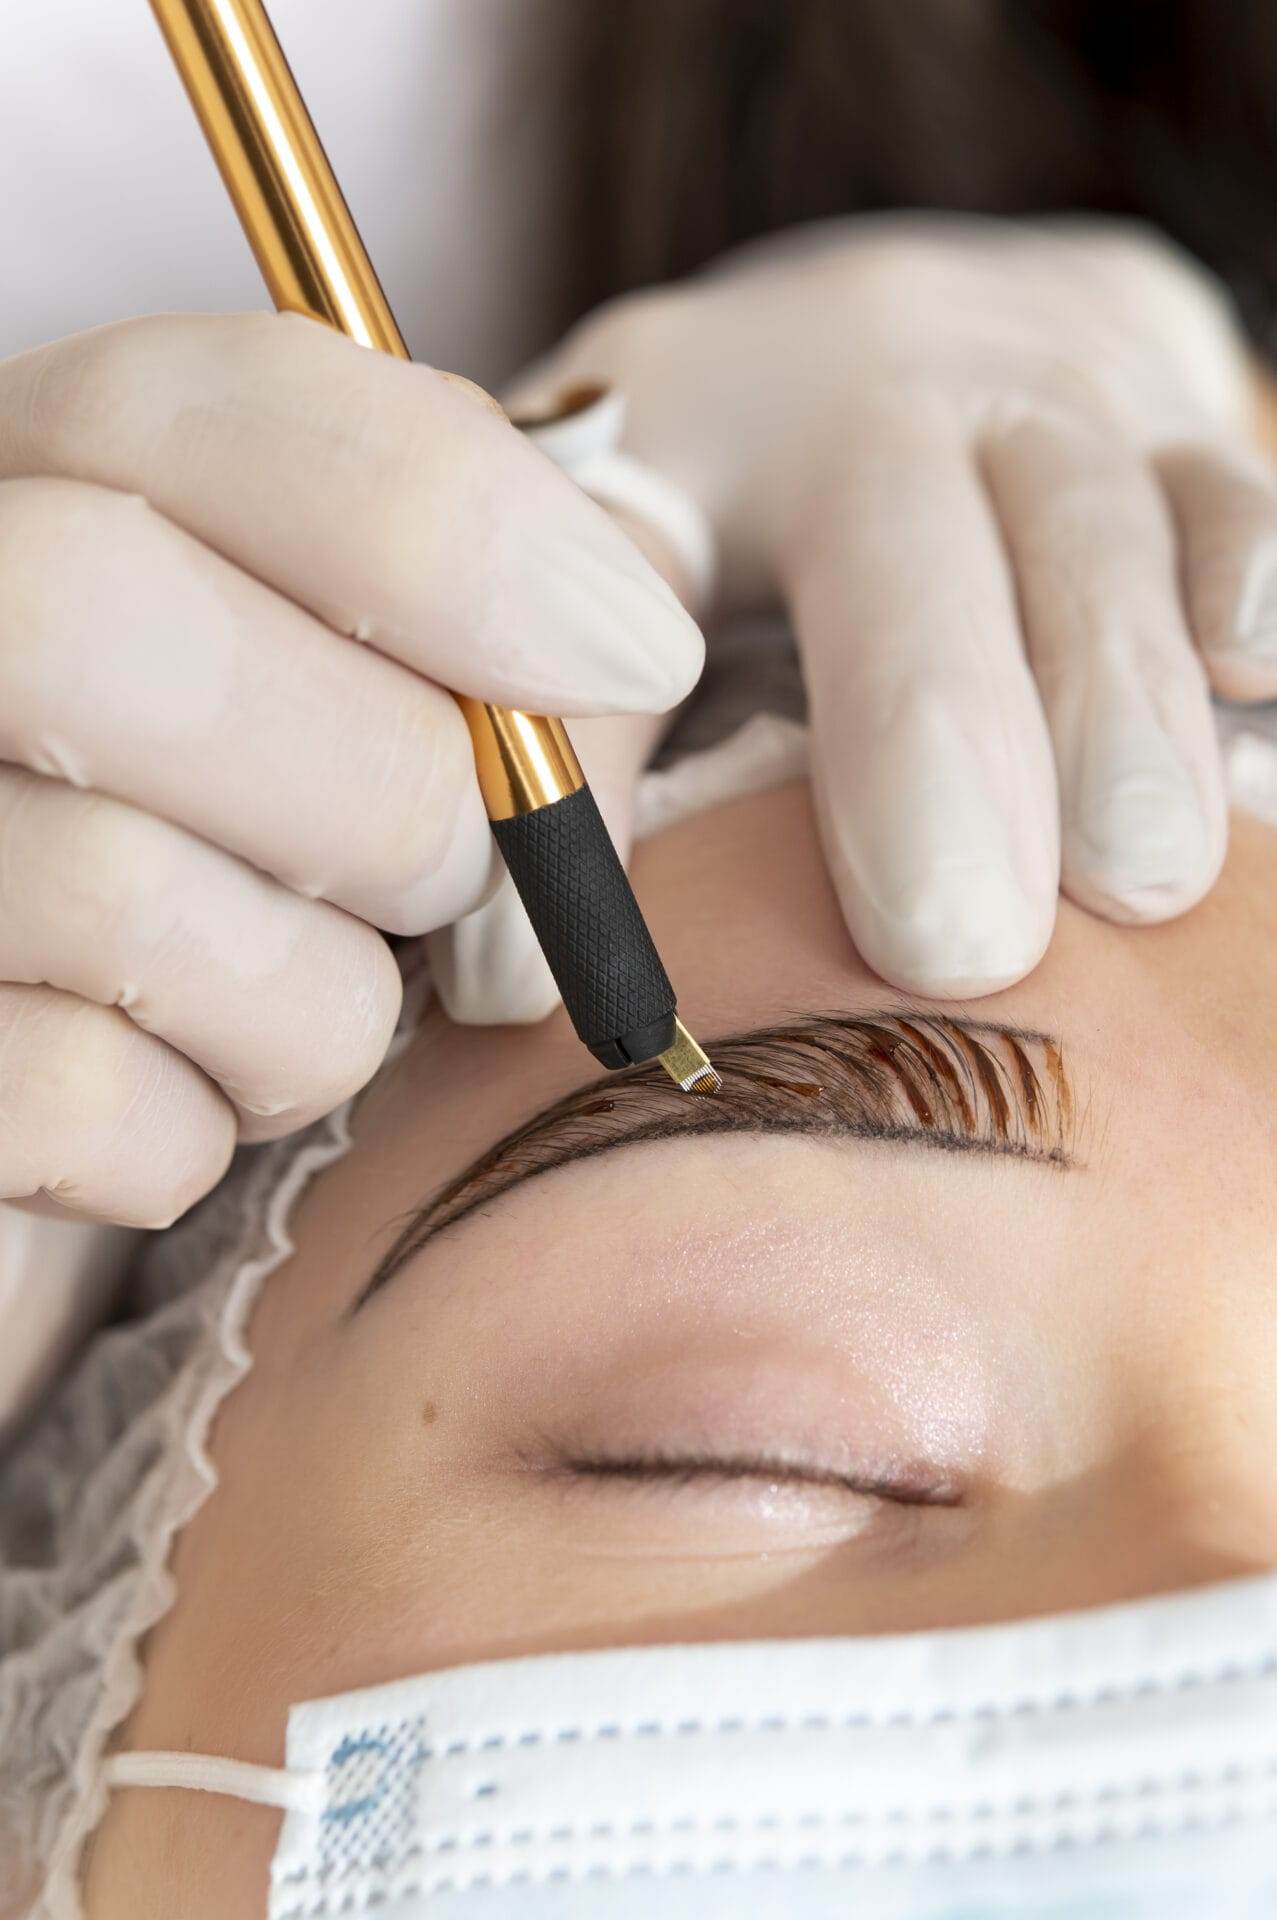
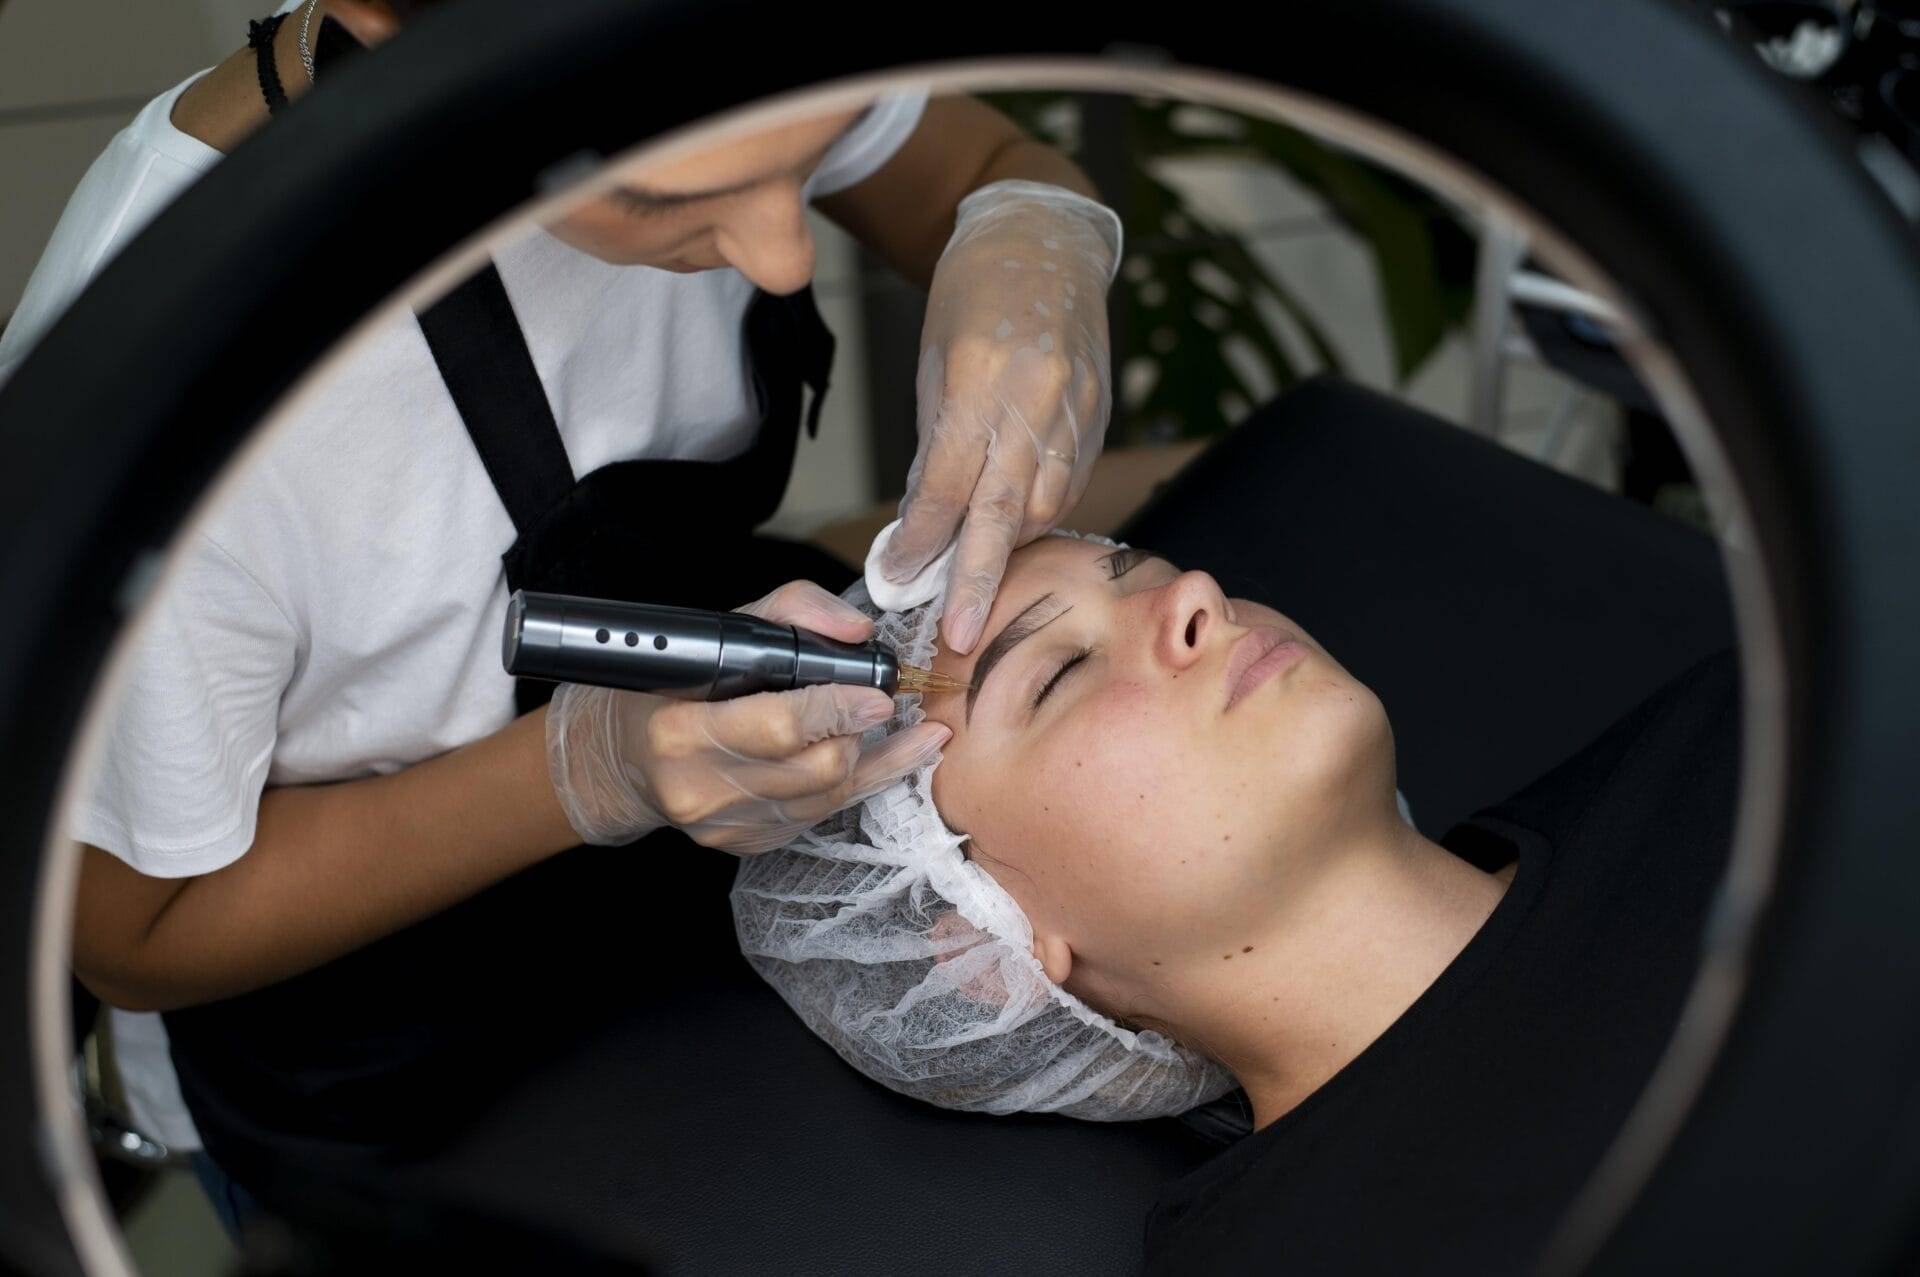
The tools used in microblading are essential for achieving precise and natural-looking results. The main tool used in microblading is a handheld device called a microblade or microblade pen. This tool consists of a handle and a blade with tiny needles that are used to create the hair-like strokes on the brow area.
It is important to use high-quality tools in microblading to ensure safety and optimal results. Cheap or low-quality tools can lead to uneven pigment distribution, increased risk of infection, and poor healing. Look for tools that are made from high-quality materials, such as stainless steel or medical-grade titanium, as these are less likely to cause irritation or allergic reactions.
When choosing the right tools for your skin type, it is important to consider factors such as needle size and blade shape. Thinner needles are typically used for clients with thinner skin, while thicker needles are used for clients with thicker skin. The blade shape can also vary, with options such as U-shaped, V-shaped, or flat. The choice of blade shape depends on the desired brow shape and the artist’s technique.
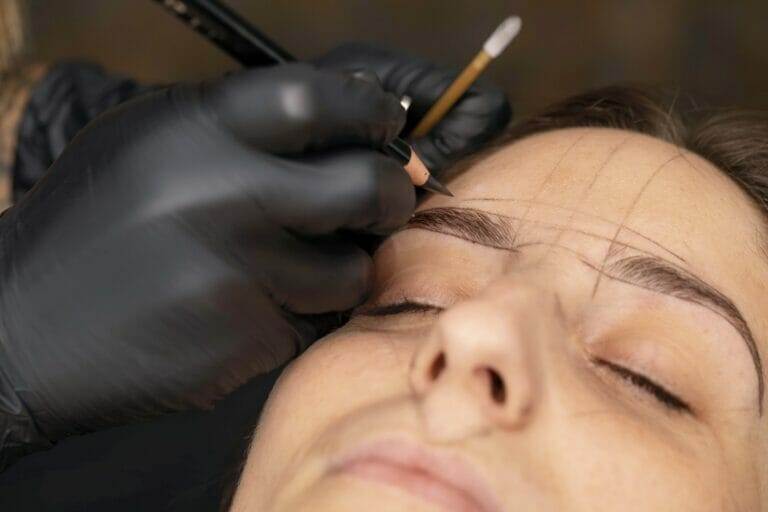
The Art of Shaping: Creating the Perfect Brow Outline
Brow shaping is a crucial step in the microblading process, as it sets the foundation for the final result. The shape of your brows should complement your facial features and enhance your natural beauty. It is important to work with your microblading artist to determine the best brow shape for your face.
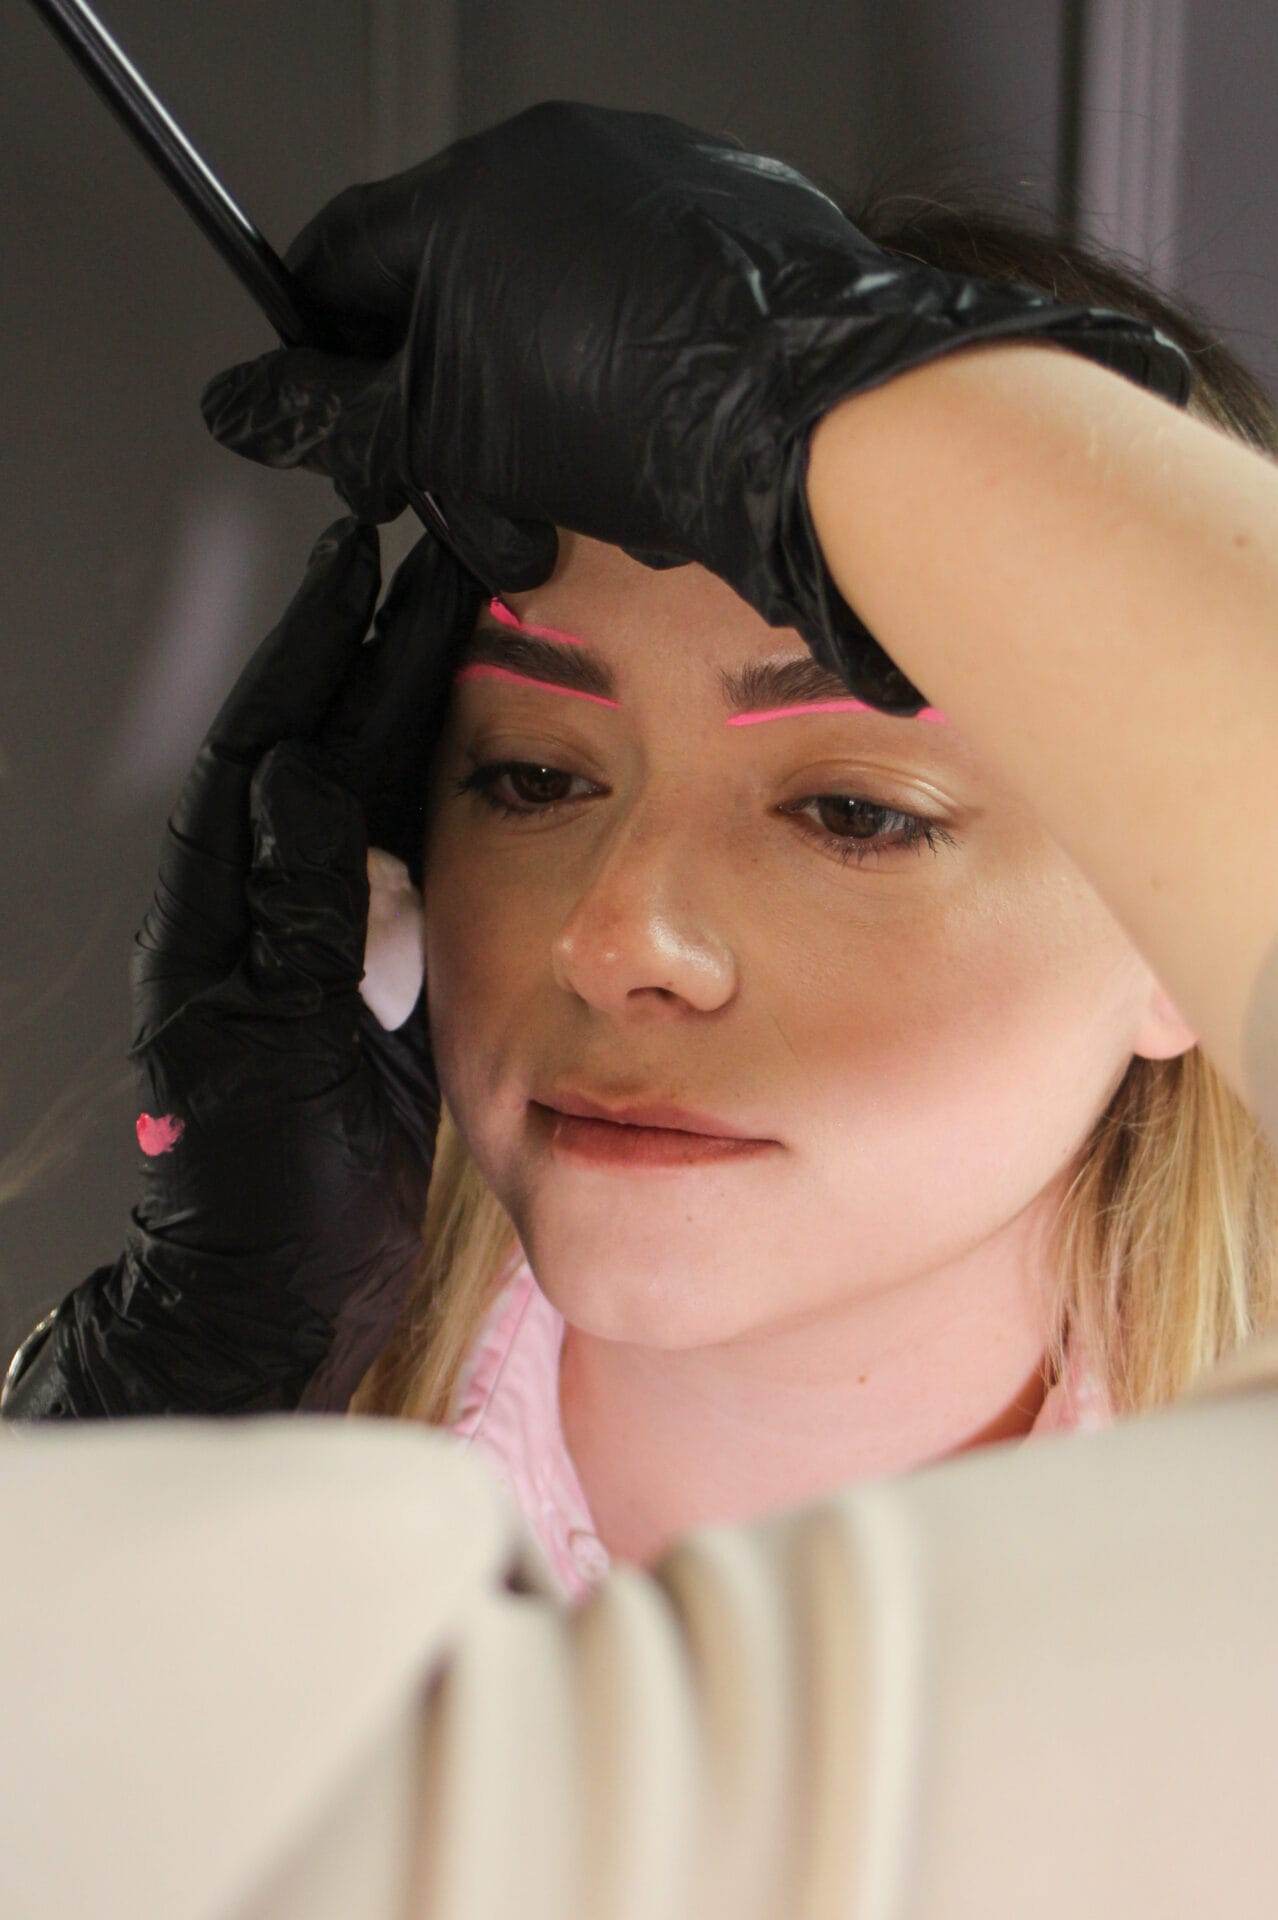
To create the perfect brow outline, the microblading artist will use various techniques and measurements to ensure symmetry and balance. This may involve using a brow pencil or ruler to map out the desired shape and arch of the brows. The artist will take into consideration factors such as your face shape, eye shape, and natural brow hair growth pattern.
Tips for achieving symmetry during the shaping process include using a mirror to check both brows from different angles, measuring the distance between the brows and other facial features, and adjusting the shape accordingly. It is important to communicate with your microblading artist throughout this process to ensure that you are happy with the proposed brow shape before proceeding with the microblading procedure.
The Science of Color Theory: Matching Pigments to Skin Tone
Color theory plays a crucial role in achieving natural-looking results in microblading. The goal is to match the pigment color to your natural brow hair color and skin tone. This requires an understanding of how different pigments interact with different skin tones.
When choosing a pigment color for microblading, it is important to consider factors such as undertones and intensity. Undertones refer to the underlying colors present in your skin, such as warm (yellow or golden) or cool (pink or blue). Intensity refers to how light or dark a color appears.
To match pigments to skin tone, microblading artists often use a color chart or swatch book that contains a range of pigment colors. They will compare the colors to your natural brow hair and skin tone to find the best match. It is important to choose a pigment color that is not too light or too dark, as this can result in unnatural-looking brows.
Choosing the right pigment color is crucial for achieving long-lasting results. Over time, pigments can fade or change color due to factors such as sun exposure and skin regeneration. By choosing a pigment color that matches your natural brow hair and skin tone, you can ensure that your brows will age gracefully and maintain their natural appearance.
The Microblading Procedure: A Step-by-Step Guide
The microblading procedure typically consists of several steps, starting with a consultation and ending with aftercare instructions. Here is a step-by-step guide to the microblading procedure:
1. Consultation: During the consultation, you will discuss your desired brow shape and color with the microblading artist. They will assess your natural brows and make recommendations based on your facial features and skin tone.
2. Numbing: Before the procedure begins, a topical numbing cream or gel will be applied to the brow area to minimize any discomfort.
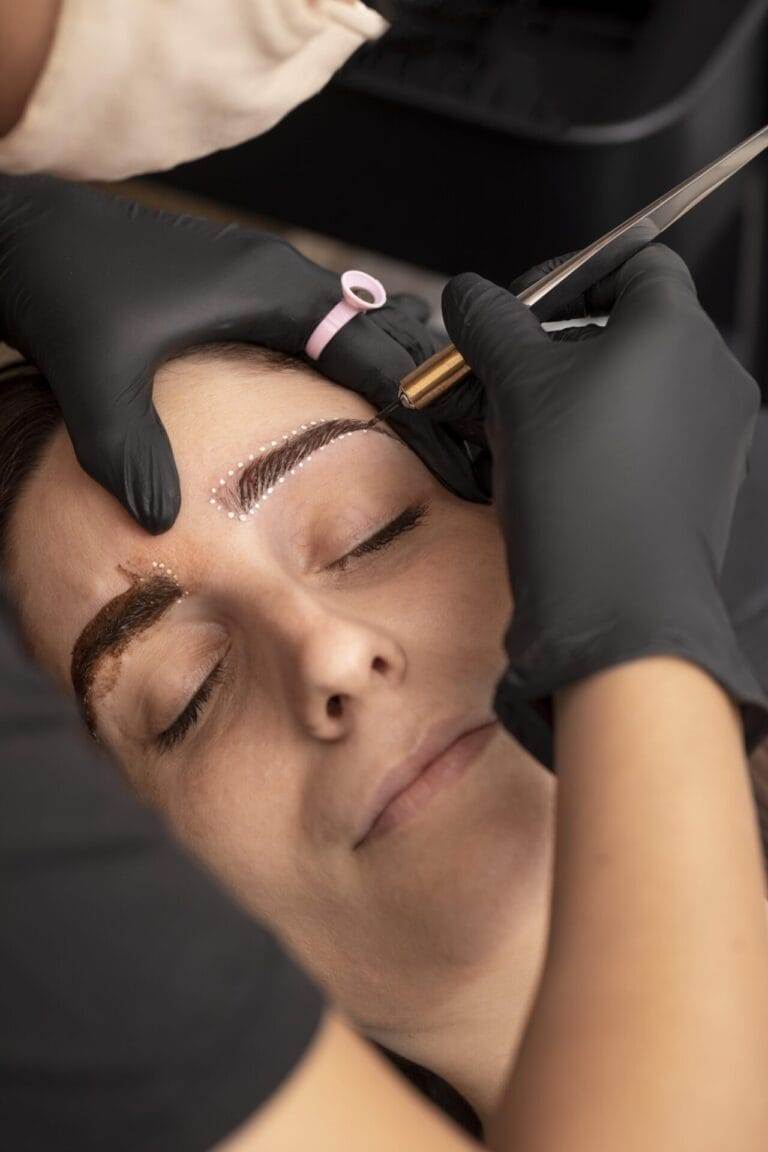
3. Brow Mapping: The microblading artist will use a brow pencil or ruler to map out the desired shape and arch of the brows. This involves measuring various points on your face to ensure symmetry and balance.
4. Pigment Selection: The microblading artist will select a pigment color that matches your natural brow hair and skin tone. They may also mix different pigments to achieve the desired color.
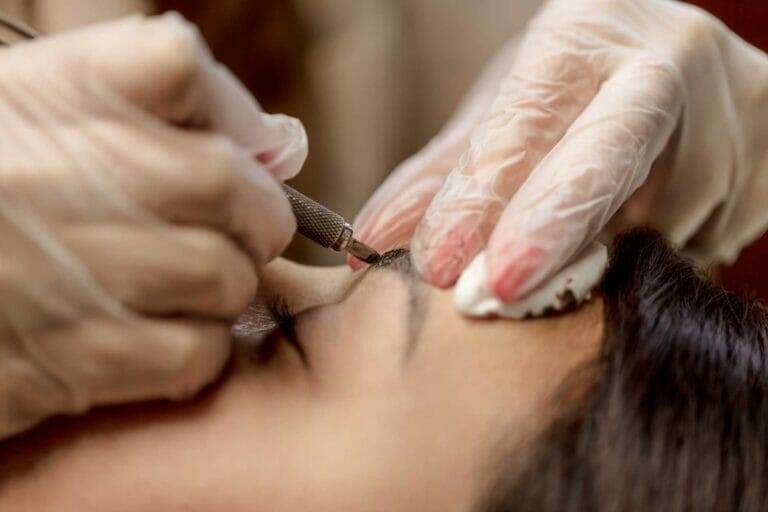
5. Microblading: Using a handheld microblade tool, the artist will create hair-like strokes on the brow area by manually depositing pigment into the upper layers of the skin. This process is repeated until the desired fullness and shape are achieved.
6. Pigment Application: Once the microblading is complete, the artist will apply additional pigment to the brows and let it sit for a few minutes. This helps to intensify the color and ensure long-lasting results.
7. Final Touches: The artist will clean the brow area and apply a healing ointment to promote proper healing. They may also make any final adjustments or touch-ups to ensure symmetry and balance.
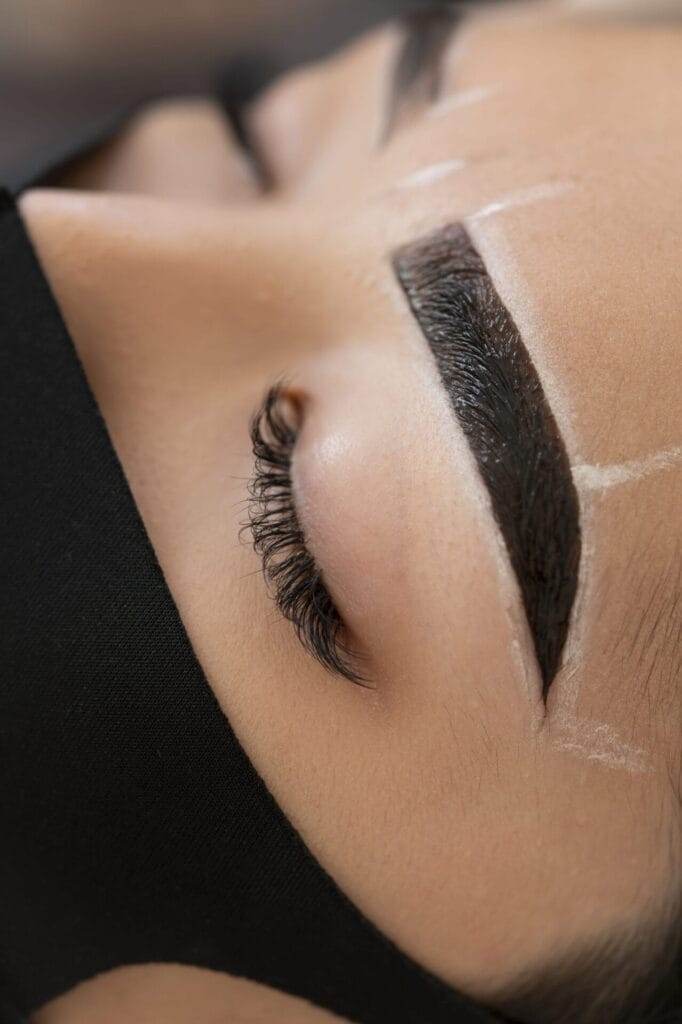
The microblading procedure typically takes around two to three hours to complete, depending on various factors such as the desired brow shape and fullness. It is important to be patient and trust the process, as the final results may not be immediately visible. The full healing process can take up to four weeks, during which time the brows may appear darker or slightly uneven.
The Dos and Don’ts of Aftercare: Keeping Your Brows Looking Their Best
Aftercare is a crucial part of the microblading process, as it helps to ensure proper healing and long-lasting results. Here are some dos and don’ts of aftercare for microbladed brows:
Dos:
– Keep the brow area clean by gently washing it with a mild cleanser or water.
– Apply a thin layer of healing ointment or balm to the brows to keep them moisturized.
– Avoid touching or scratching the brow area, as this can disrupt the healing process.
– Protect your brows from sun exposure by wearing a hat or applying sunscreen.
– Avoid swimming or excessive sweating for at least two weeks after microblading.
Don’ts:
– Avoid applying makeup or other skincare products directly on the brow area for at least two weeks.
– Avoid picking or peeling any scabs that may form during the healing process.
– Avoid using exfoliating products or treatments on the brow area.
– Avoid saunas, steam rooms, or hot showers for at least two weeks after microblading.
– Avoid sleeping on your face or rubbing your brows against pillows or sheets.
Following these aftercare guidelines will help ensure that your microbladed brows heal properly and maintain their color and shape. It is important to note that everyone’s healing process is different, and individual results may vary. It is also normal for the brows to appear darker or slightly uneven during the initial healing phase.
Common Mistakes to Avoid: Tips for Achieving Flawless Results
While microblading can result in beautiful and natural-looking brows, there are some common mistakes that should be avoided to achieve flawless results. Here are some tips for avoiding these mistakes:
1. Over-plucking or over-tweezing: It is important to avoid plucking or tweezing your brows excessively before or after microblading. This can disrupt the natural hair growth pattern and make it difficult for the microblading artist to create a symmetrical and balanced shape.
2. Ignoring aftercare instructions: Following the aftercare instructions provided by your microblading artist is crucial for proper healing and long-lasting results. Ignoring these instructions can lead to poor healing, color fading, or even infection.
3. Choosing the wrong pigment color: Choosing a pigment color that does not match your natural brow hair and skin tone can result in unnatural-looking brows. It is important to work with your microblading artist to find the best color match for your individual features.
4. Skipping the consultation: The consultation with your microblading artist is an important step in the process, as it allows you to discuss your desired brow shape and color. Skipping this step can lead to miscommunication and dissatisfaction with the final results.
5. Going to an unqualified artist: It is crucial to find a qualified microblading artist who has received proper training and certification. Going to an unqualified artist can result in poor technique, uneven results, or even health risks.
By avoiding these common mistakes and following the guidance of a qualified microblading artist, you can achieve flawless and natural-looking brows that enhance your facial features.
Troubleshooting: How to Fix Microblading Mishaps
While microblading is generally a safe and effective procedure, there are some common mishaps that can occur. Here are some tips for fixing these mishaps:
1. Uneven brows: If your brows appear uneven after microblading, it is important to consult with your microblading artist. They may be able to make adjustments or touch-ups to achieve symmetry and balance.
2. Color fading or changing: Over time, the pigment used in microblading can fade or change color due to factors such as sun exposure and skin regeneration. If you notice significant color fading or a change in color, it may be necessary to schedule a touch-up session with your microblading artist.
3. Scarring or infection: While rare, scarring or infection can occur after microblading if proper aftercare instructions are not followed. If you experience any signs of infection, such as redness, swelling, or pus, it is important to seek medical attention immediately.
It is important to remember that microblading is a semi-permanent procedure, and individual results may vary. While some mishaps can be fixed with touch-ups or adjustments, it is crucial to find a qualified microblading artist who can provide the necessary expertise and guidance.
Mastering the Touch-Up Process: Maintaining Your Perfect Brows
Touch-ups are an important part of maintaining your perfect brows after microblading. The frequency of touch-ups depends on various factors such as skin type, lifestyle, and aftercare. On average, touch-ups are recommended every one to two years to maintain the color and shape of the brows.
During a touch-up session, the microblading artist will assess the condition of your brows and make any necessary adjustments or touch-ups. This may involve adding more pigment to areas that have faded or making slight changes to the shape or arch of the brows.
To maintain your perfect brows between touch-up sessions, it is important to follow a proper aftercare routine. This includes avoiding excessive sun exposure, using sunscreen on the brow area, and avoiding harsh skincare products or treatments that can fade the pigment.
By staying consistent with touch-ups and following a proper aftercare routine, you can ensure that your microbladed brows continue to look their best and maintain their natural appearance.